How Tattoo Artists Make Stencils, Step by Step
7 min read
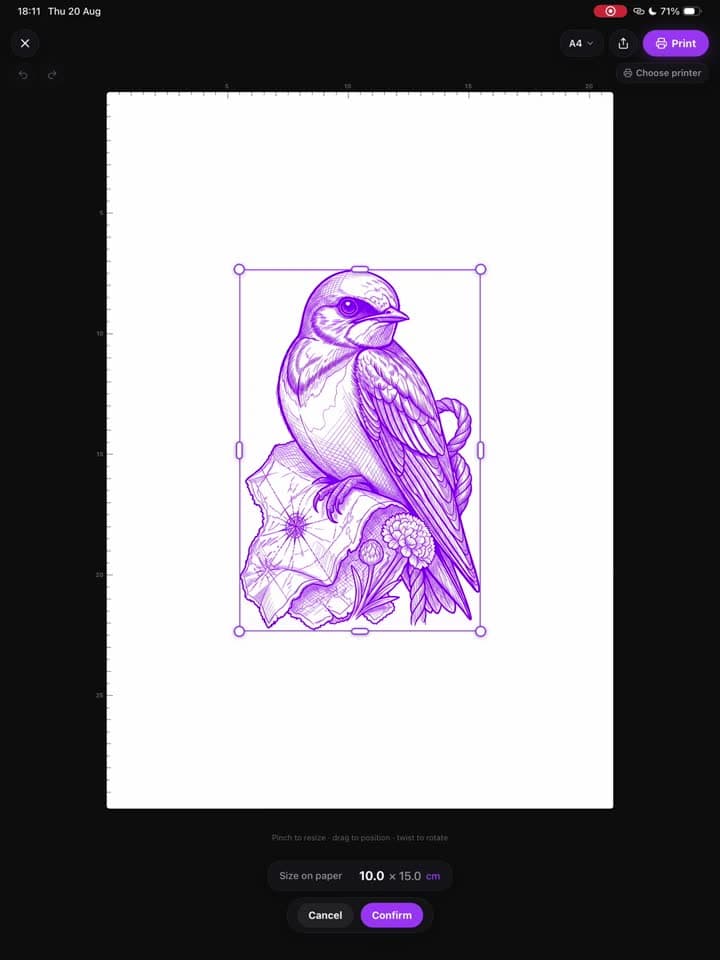
Every clean tattoo starts with a stencil — the purple line map the artist follows with the needle. This is how tattoo artists make stencils in a working studio: from the approved design to linework, sizing, printing, skin prep and a transfer that lasts the whole session. If you're making a stencil at home for the first time, the DIY guide covers the simpler routes.
How tattoo artists make a stencil, in 6 steps
- Finalize the design with the client, then reduce it to stencil linework: outlines plus the borders of the main shadows.
- Measure the placement on the body and set the stencil to that exact width.
- Print it at 100% scale on thermal transfer paper, or trace it by hand onto hectograph paper.
- Shave, clean and degrease the skin, then apply a thin layer of stencil transfer solution.
- Press the stencil on evenly, peel it off in one motion, and check the placement with the client.
- Let it dry fully before the first line — many artists wait at least 10–15 minutes.
Step 1: From approved design to stencil linework
A stencil isn't the finished drawing. It's a map: the outlines, the edges of the main shadows, and the few details the artist can't afford to guess. Soft gradients and texture are left off — they're shaded freehand, and too many lines on the skin turn into noise. The more detailed the piece, the more this editing step matters.
Artists get from design to linework in one of three ways:
- By hand — tracing the essential lines over the drawing, often on a lightbox. The traditional way, and still common for custom work.
- In a drawing app — drawing or tracing a separate line layer in an app such as Procreate, then printing that layer.
- With a stencil app — generating the linework from a reference photo or drawing, then cleaning it up before printing.
Where a stencil app fits
Stencil AI covers one step of this workflow: turning a reference image into clean, transfer-ready linework. Upload a client photo, your own drawing or a piece of flash, pick a style, and the stencil is ready in about 30–60 seconds. It works from an image — there's no prompt, and it doesn't invent designs — and it isn't a drawing app: many artists generate the base stencil in Stencil AI and refine the linework in Procreate.
- Outline — single-weight clean lines for bold, simplified work: lettering, tribal, geometric and small pieces.
- Standard — groups the shading into tonal blocks, for designs with straightforward shadows.
- Hatching — cross-hatched shadow tracking for realism: portraits, fur and complex texture.
In the iPhone, iPad and Android app, and in the browser on a PC or Mac, the Retouch editor handles the cleanup: erase stray marks, redraw lines, lighten or darken areas with pressure-sensitive brushes, and tap to remove unwanted solid fills while the outlines stay protected. Over 5,000 paying tattoo artists use it this way, and every Hobby, Pro and Studio plan includes full commercial licensing for client work.
Step 2: Size it to the placement
Size is decided on the body, not on the screen. Measure the placement on the actual spot, then print at exactly that width. A stencil that comes out 10% too big is a reprint, so print at 100% scale, never "fit to page", and check the first print with a ruler.
Many artists print a design at two or three sizes and hold them against the client before committing. Curved placements such as shoulders, forearms and calves are the hardest, because a flat sheet can't follow a curve without distorting.
Stencil AI prints at real-world size: set the width, and what comes out of the printer matches the measurement. On supported iPhones, LiDAR measuring lets you measure the placement with the camera and use it as the print size, and the Warp tool bends the stencil to follow a shoulder or arm before you print. Several stencils can share one sheet, each at its own exact size.
Step 3: Print (or trace) the stencil
Studios put the linework on transfer paper in one of three ways:
- Thermal stencil printer + thermal transfer paper — the studio standard. The printer transfers the purple carbon line onto the stencil sheet: fast, consistent and repeatable. Older thermal copiers make the same kind of stencil from a drawing on paper.
- Inkjet printer + stencil ink + inkjet stencil paper — a cheaper route on a regular refillable inkjet. Once stencil ink goes in, the printer stays dedicated to stencils.
- Hectograph (freehand) paper — no printer at all: trace the design by hand and the pressure transfers the purple line. Slower, but cheap and always available.
Two checks before the sheet goes near skin. First, the lines should be a deep, even purple — faint prints transfer faint, so raise the printer's darkness setting if needed. Second, orientation: a transfer flips whatever is on the side that touches the skin. If you print straight onto the transfer side, as with inkjet stencil paper, mirror the file first. Thermal setups vary by printer and app, so do one test print with a word on it and you'll know for good whether yours needs mirroring. Stencil AI's print screen has a Mirror button for exactly this.
For printer settings and fixes, see how to print a tattoo stencil; for paper types and sizes, the tattoo stencil paper guide.
Step 4: Prep the skin
Shave
Clean and degrease
Apply transfer solution
Step 5: Apply, lift and check the placement
Have the client hold the body part in its natural, relaxed position — skin stretches, and a stencil applied to a flexed arm shifts when the arm relaxes. Lay the stencil down from the centre outwards, press it flat without sliding, and hold it for a few seconds. Then peel it off in one smooth motion.
Check the placement with the client standing naturally in front of a mirror. If it's off, clean it off, let the skin dry and apply a fresh stencil. Redoing a stencil is normal; redoing a tattoo isn't.
Step 6: Let it set
A fresh stencil smears the moment a glove or paper towel touches it. Let it dry fully before the first line — many artists give it at least 10–15 minutes. During the session, wipe gently rather than scrubbing, so the lines last until the outline is in.
Common stencil problems (and fixes)
- Smudged or bleeding lines — too much solution, skin that wasn't dry, or tattooing before the stencil set. Use a thin coat and give it time.
- Faint or patchy lines — a faint print, low-contrast linework or uneven pressure. Raise the printer darkness, start from bold, clean lines, and press the whole sheet flat.
- Mirrored lettering — the transfer flipped the design. Mirror before printing when your method needs it, and test-print a word once per setup.
- Wrong size — "fit to page" scaled the print. Print at 100% and measure the first print.
- Distortion on curves — the stencil went on with the skin stretched. Apply it in a relaxed position, and for shoulders and forearms, warp the stencil to the body before printing.
- Stencil wipes off mid-session — not enough drying time, or too much wiping. Let it set longer and wipe gently.
Frequently asked questions
What do tattoo artists use to make stencils?
Most studios use a thermal stencil printer with thermal transfer paper. Some use an inkjet with stencil ink and inkjet stencil paper, and many still trace by hand onto hectograph paper. The linework itself comes from the artist's drawing, a drawing app such as Procreate, or a stencil app like Stencil AI, which turns a reference photo into tattoo-ready linework in 30–60 seconds.
Do tattoo artists draw stencils by hand?
Some do. Tracing onto hectograph paper is how many artists learned, and some draw custom pieces straight onto the skin with a skin marker. Most printed designs, though, go through a thermal printer, which is faster and repeatable.
What do tattoo artists put on the skin before the stencil?
They shave the area, clean it with green soap, remove the oils (often with rubbing alcohol), let it dry, and then apply a thin layer of stencil transfer solution so the line grips the skin.
How long should a tattoo stencil dry before tattooing?
Until it's fully dry — many artists wait at least 10–15 minutes. Tattooing over a stencil that hasn't set smears the lines.
No transfer paper on hand? Here are the ways to make a stencil without transfer paper — fine for placement previews, not for client work.
Turn a client's reference into a stencil
Upload a reference photo and get clean, true-to-size stencil linework in about 30–60 seconds — ready for your thermal printer.
Try Stencil AI